Showing posts with label messy. Show all posts

Monday, 17 February 2014

Snowy snowy snowy snowy snow


Snow excavation (possibly a dragon)
This has been a winter in which I feel I am earning my Canadian stripes with snow shovelling and lots of cold temperatures and so on. I was feeling guilty at the pristine blanket of snow in our back garden - it seemed terrible not to be making footprints and snowmen and forts in it. So, on Family Day, I insisted that we rectify this. Up - breakfast - snow gear on and out to enjoy the snow or be damned.
Trailing through snow


I had been organised enough to save some washing up liquid bottles to fill with food dye to do painting on the snow. Husband had even got some scientific grade blue stain which seemed potentially unwise but turned out to wash out easily.

The snow was not very sticky so we piled it up and excavated it rather than really building but am pleased to say we disrupted the blanket sufficiently. Ten centimetres of fresh snow are forecast for tonight, though so we may have to do the same again next weekend.
Eating snow
Painting snow

Friday, 13 December 2013

Opting out

Festive coffee filter garland
Lazy weekends are somewhat harder to actually have at all relax and enjoy when you have delightful, enthusiastic and energetic young children. I had grand plans, one Saturday evening, to bring the Zeds swimming AND ice skating while Husband was off playing badminton. On Sunday morning, my weather app said -8C and Z1's earnest, wholesome and easy suggestion of a scoot to the nearby graveyard (it's lovely, honestly, it is- trees and peace) followed by Christmas crafts seemed like a lot of effort.
Snowflake 1
Magnificent snowflake number 2
Attempt one at crafts on this day was snowflakes from coffee filters which we made with some success last year despite being out in a cafĂ©. I had even practiced two this year and was pleased with the first one until I made the magnificent second one. However, Z1 got frustrated very easily and my attempt to follow a template without actually marking it out on the coffee filter was less than impressive. Even Z1, who is usually quite kind and enthusiastic about my efforts was not inspired.

We stopped for lunch and, afterwards, I suggested painting the coffee filters. I rarely get out the paints but I figured I could just supervise while drinking tea so it seemed like a good plan. It was. They sloshed paint about on the filters, I have a wipe clean tablecloth and they didn't fight. The stroke of genius, on my part, was deciding to string them up as a garland as it meant I didn't have to leave them on the table to dry or risk the wrath of the Zeds by putting them into the recycling (at least, not yet).


 We did not go out scooting to the graveyard. 

Wednesday, 30 October 2013

Would pumpkin seeds be big for spiders?

Z1's plan

Mine, Z2's in the middle
& Z1's at the back
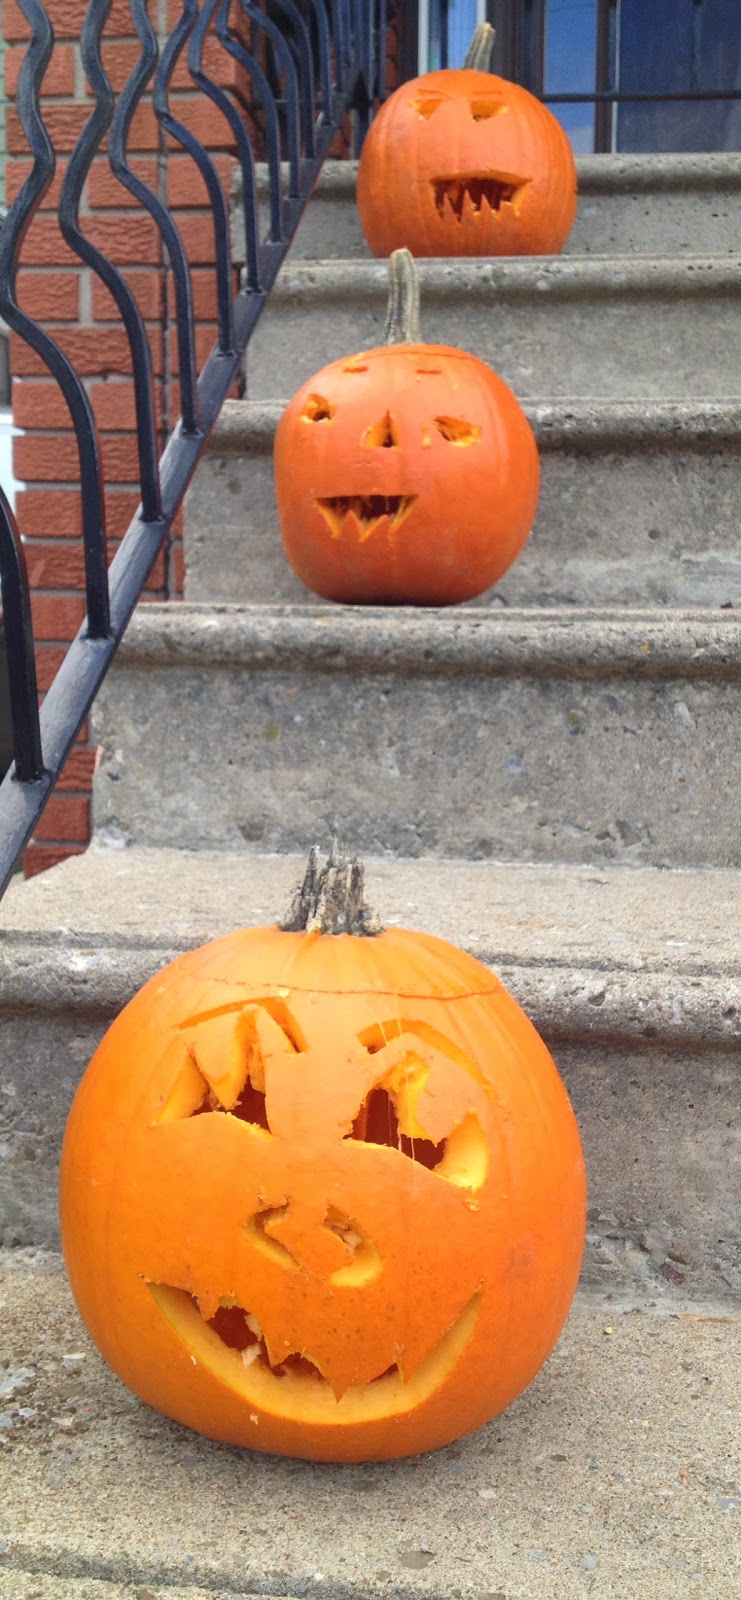
The first thing I must say is that Z2 was not impressed with the idea of hammering cookie cutters into his pumpkin. I really thought he would be as one of his first and favourite sentences for a long time was "I'll fix it with a hammer". However, now he is very big and three whole years old and he definitely wanted to use a sharp thing. Thankfully, the Dollarama pumpkin carving tools (oh yes, I have specific pumpkin carving tools, this is serious business) are not so sharp that I was concerned for his digits so he was allowed to wield one.
 Secondly, I should explain the title of this post. This was a question asked by Z1 during the course of our pumpkin carving. I was a little baffled by it so I asked her to clarify. It turns out she was imagining that the stringy bits of pumpkin guts that we gleefully hauled out with spoons and fingers were spider webs. As a result of this thought, she was wondering whether a spider the size of a pumpkin seed would be considered big. I decided it would be medium.
 Thirdly, it is worthy of note, I feel, that the eyebrows on Z2's pumpkin were entirely his own doing - he poked the holes and wiggled that carving tool around sufficiently to make them. He had help with all other features. Z1 also mostly took the role of artistic director on her pumpkin. The bluntness of the Dollarama carving tools not only makes them relatively safe for big three year olds, but also makes it fairly hard work to carve a pumpkin with them. Perhaps next year I shall upgrade my tools.


Z1's pumpkin
The last thing which I feel I must mention to make this post complete is that I went to the trouble of removing pulp and string from the seeds in order to roast/toast/bake them as snack. Z1 had tried some last year when one of her teachers did this and it does feel awfully wasteful, even for the spookily good price I bought these pumpkins for, to throw away such bounty.  Initial feedback was good, Z1 asked for more and said they tasted like popcorn. However, the next day Z2 specifically requested, out of the blue, that he not have pumpkin seeds for dinner and Z1 did not eat any of the seeds which I packed, with some degree of satisfaction, for her lunch. I quite like them but I feel that some of them may be destined for the rubbish bin after all.


Wednesday, 24 July 2013

In which I am the over-zealous parent at a party

In general, I quite enjoy going to the Zeds' friends' birthday parties. The reasons for this are multiple: 1. I usually get cake 2. I like watching children run around and be over-excited 3. I enjoy reminiscing about the parties I had and the ones I went to as a child. 4. Chatting with other parents is mostly pleasant.


Z2's had all the action on the back
tie dye, crafts, wearable art
       Pensive           Action shot
                              of the back
At a birthday party over the weekend (one of two - two birthday parties in one weekend is a bit much, even for me, I will admit), I fear I was the annoying parent. My first wrongdoing was texting the night before to say that Z2 and husband would come along "if that's ok" in addition to myself and Z1. The gracious hostess said that was fine and asked, apologetically, if I could bring a white t-shirt for Z2 to dye as the ones she had were accounted for. I assured her I would and not to worry as we'd bring a hankie or something otherwise. I also said I was excited about the idea of tie dye at which point she, quite possibly joking, said I could bring something along to dye myself. Here is my second wrongdoing - I did bring a vest top to dye myself. As I type, I feel slightly ashamed but I was very excited - I haven't done tie dye in years and this was to be spray dyes which I had never even heard of.


And me and mine
The wise mother-of-the-birthday-girl had organised the whole party in the back garden - 5 year olds and dye at a party in one's house could have been a little disastrous for the walls and carpet, I would imagine.  Z1 decided against the "tie" part of tie dye and just went freestyle with the spray on the shirt. She loves it and wore it a birthday party in the park the next day as well as to school on the following Monday. I think she carries it off with style and aplomb. I was very good and did not interfere in her creative process. Even better, despite being, perhaps  almost certainly, over-involved in the tie-dying activity (I had to remind myself a couple of times to wait my turn after the official birthday guests were finished), I did allow Z1 to ruin add her artistic influence to my top. Z2's contribution to his was chiefly in choosing the colours. So, who do you think wears it best?

You may also be interested to know:
  • Other highlights of this party included this jelly goo stuff which entertained the small people for ages as they declared themselves to be lizard princes/princesses/queens and smeared it all over their skin, there was also a paddling pool AND ice cream with sprinkles and sauces in addition to the standard and necessary cake. Magnificent party overall (Thanks, Jennifer, if you happen to be reading!).
  • There may be more tie dye posts to come - I have been inspired.


Monday, 22 April 2013

A twinkly tortoise

Sometimes, when Z1 is watching television, she gets jiggly and fidgety. My first guess is usually that she needs to go to the toilet but, in fact, it is more frequently an urge to go and make or draw something that she has just had an idea for but can't quite pull herself away from the screen to get the materials for.


glitter glue, glitter, craft, tortoise, art
Glitter glue tortoise
glitter glue, tortoise, art, kid's art, children's art, glitter
Destroyed glitter glue tortoise
On Saturday, she turned to me in the middle of Gnomeo and Juliet (the weather had changed from early summer back to winter and I was damned if I was going back outside after having dragged the three of us off to ballet in the morning) and she asked told me to draw a tortoise with glitter glue. Just like that - no warning or preamble or context. I think I rose to the challenge. Sadly, she ruined it. The carefully executed tortoiseshell has been destroyed.

She then went on to draw this. Despite appearances, she assures me it is not a clown.


drawing, glitter glue, children's art, kid's art
Not a glitter glue clown

Friday, 22 February 2013

Baby Bels and Waxy McWax

wax, pom pom, googly eyes, craft, kid's craft, children's craft, craft creature
Waxy McWax
Z1 made this little beauty while I was making dinner one evening. She had a mini Baby Bel cheese to stop her fading away while dinner was cooking and I gave her the wax to play with. Next thing I knew she was asking me to open the glitter glue. Kindly and firmly, I told her I was glad she enjoyed doing crafts but it was dinner time, not glitter glue time. I continued cooking dinner. This involves having my back turned to the rest of the kitchen. When I turned around, there were globs of glitter glue, along with this little guy, on the kitchen table. Sigh. At least glitter glue is easy to clean up.

Tuesday, 19 February 2013

Dragon eggs are kind of palish

newspapers, spotty tablecloth, papier mache materials
Newspaper ready
to go
This idea was inspired by this blog post here about not doing crafts with children. I get the impression from her picture of bunting that this blogger is probably a more skilled crafty person than me. However, I must gently disagree with her decision to use ordinary eggs as dragon eggs - surely they would be bigger?

Before I had even finished reading the blog post, I decided that we would make a dragon egg using papier mache around a balloon. I Googled to find recipes for the the paste and congratulated myself on not throwing out the junk mail newspapers that I had saved from before Christmas in case of ever doing papier mache.  Tearing the strips is quite a pleasing task. I was also pleased that I hadn't used up all the balloons doing these.


blue and green, craft, preparation, balloon, papier mache
Balloon and paint brushy
 things
While boiling up the water for the paste, the Zeds played with a balloon each. Predictably, it ended in tears when Z2 burst his. I distracted him from his misery with a couple of pre-lunch Smarties, then we ate luch, Z2 was despatched for his nap and Z1 and I sat down at the kitchen table to get going.

balloon, craft, papier mache
First layer
hanging to dry

I asked Z1 if she wanted a music on my laptop but she said she would prefer it to be quiet because otherwise she would be distracted. She was right and I was supposed to have learned that lesson already. We worked together happily and harmoniously and chatted about what colour we should paint it when it was finished. She told me that dragon eggs are kind of palish.


After she had gone to bed, I slapped another layer on to the now dry first layer to speed up the process as I didn't know how long Z1 would be willing to string this activity out. It did tie in quite nicely with the snow dragon which we made between layers so we had a bit of a dragon theme in the house.


balloon, craft, papier mache, paper mache, paint, glitter
Z1 in action painting
and glittering the egg
balloon, craft, papier mache, paper mache,
The finished dragon egg
hanging above our sink
Incidentally, our
dragon egg is not palish
but it is glittery.
Painting and glittering took place while I prepared Z1's school lunch and cooked rice for dinner. I didn't notice any glitter in the lunch or the rice but either way, thanks to reading an article about pregnancy tests for rhinos in Dublin zoo a few years ago, I am confident that glitter will not be harmful if ingested. I know human digestive systems are probably a bit different to those of rhinos but zoos are usually pretty careful about what they feed their animals so I am sure it's fine.


You may also be interested to know: 

  • The paste recipe I used (in the highlighted box at the bottom of the linked page) made a lot of paste. A large mixing bowl full. We have most of it left. I did add salt to stop it going mouldy but if anyone has a recipe for making it edible, please do send it my way.
  • We used some of Z1's discarded drawings on plain white paper for the final layer to make it easier to paint without newsprint showing through.


Tuesday, 12 February 2013

Not pancakes (but possibly even better)

Pancakes seemed like a good idea on a cold, snowy, February, nearly-pancake-Tuesday-anyway day. However, we had only a piddly amount of flour left. Very piddly - not much more than 50g. I hadn't checked before announcing the plan to Z1. (Clearly I did not learn my lesson from the not-gingerbread fiasco)  Things were looking grim.

I Googled "what can I make with 100g of flour" (in my wish for more flour than we had, I misread the scales) while Z1 stood disconsolately on the chair beside me, gazing at the flour that was not going to be a pancake in the bowl. She also kept putting her hand in it which I found somewhat irritating but flour does feel kind of silky. Google did not solve my problem.

baking, brownies, chocolate, I turned to Pinterest, recalling a single serving chocolate chip cookie recipe but came across these three ingredient Nutella brownies before I found the cookie recipe. Only ten tablespoons of flour were required. With trepidation, I got my measuring spoons and spooned out my flour - just about enough. Hurrah! I told Z1 we would make brownies instead. It was all good. We'd even just bought a new jar of Nutella. It was then that pure wonderful began. I remembered we had a jar of non-Nutella, non-hazelnut chocolate spread. It was bought when I was alerted to the fact Nutella wasn't allowed in school 'cause of the nuts. It wasn't very nice and nobody ate it...until now.
The brownies began to smell very lovely in a short space of time and then we ate them warm from the oven with the chocolate chips still melty. Z1 gave them 58 marks out of 10. (I really must work on her grasp of numbers, fractions and rating scales.) They were also rather delicious, possibly even more so, after they had cooled. 


The satisfaction of using the jar of sweet brown not-Nutella and the tiny bit of flour is immense.


Credit where credit is due: My recipe can be downloaded from here but I adapted it from Schoochmaroo's recipe at Instructables here.

Friday, 1 February 2013

Feast your eyes on these marvellous marbles


winter craft, ice sculpture, craft with kids,
I love them
I don't think much needs to be said - just marvel at my marbles. Some of them weren't completely frozen but I didn't have the patience to wait longer.  I also didn't have the patience to keep my gloves on while snipping the balloons off. That was not a good idea.

Wednesday, 30 January 2013

Bring on the minuses!

Tempting fate with green water-filled
balloon over my head. Mopping up.
We moved to Canada in April of 2011. I was dreading the winter but Toronto gave us a mild one. As this current winter started and progressed, I had been quietly thankful for each day that went by where the temperature was above -10C or so. I'd check the forecast and then check it a few more times to see if it had changed when any temperatures below zero were predicted.

The day I decided to do this project, it was a balmy 13C (only days after my personal record low temperature of -21C which we survived with minimal digit loss).
Careful placement; in the bowl, ready for placement;
striking a pose to show the arrangement off
(so mild no coat was needed!).

The forecast, as I formulated my plan, was predicting a high of -2C for the next day. I was pleased. I checked later and it said a high of 8C. I was dismayed but committed to the project so we went ahead anyway. (I also checked another forecast which still said a high of -2C - hurrah!)

That was quite an introduction without getting to the point, wasn't it? Well, the plan was to make these icy colourful marbles.

I was genuinely excited about doing these and was disappointed when Z1 and Z2 were busying themselves in the garden. I told them when they had finished playing, we'd do the water balloons. Z1 told me "We are not playing, we are taking care of the worms." and that I could do it myself.  So I did, I started by myself with a green one and went to take it outside to show the Zeds to see if they'd be interested now that there was something to look at. (I had a minor panic when Z2 could not be located - he'd wandered off behind the shed and was not responding to being called.) He was thrilled to see a balloon and happily followed me to the front to help me put it in the grass. Hurrah. Z1 soon followed when she saw that her brother was interested so we retreated to the kitchen to prepare a few more.

Here's the how to. I saw this on Pinterest and didn't read any instructions before starting. The one I did on my own was a good practice: I filled the balloon with water by stretching it over the spout and, when I removed it, water spurted out everywhere, forced out by the balloon contracting back to its deflated size, I suppose. I was not expecting that. Lesson learned.

I had a dropper to drop food colouring into the balloons before filling so the Zeds could help with that by squeezing the dropper. After that, they were guardians of the balloons as I filled the next one. We had an incident where I tied a knot too hastily and put the balloon into the bowl where it promptly splooshed its (thankfully not very brightly coloured) contents onto Z1's coat and the floor. Paper towels were promptly employed. We did a few greens and a few reds. I only had a small bit of blue food dye left which we divided between an attempt at a purple one (mixing red and blue) and a just-blue one. It may be rather pale. I didn't fill them as large as they look in the Pinterest picture as I was fearful of balloon breakage and also thought that it would be good that the smaller ones would freeze more quickly.

They are outside as I type. Current outside temperature is 12C (at 9pm) though it is predicted to be -3C by 8am which is around when we will be leaving the house. I cannot wait to poke them but I suspect the big reveal (cutting the balloons off) will be Friday or possibly even Saturday. There is also snow forecast so we might have to dig them out to see them. Bring on the minuses!

Monday, 10 December 2012

Pine cones! Glitter! Christmassy!

pine cones, Christmas, craft, snowflakes, snowflake tablecloth
Before
(with snowflake tablecloth)
Oh my, today was fun: from picking up pine cones in the playground of Z1's school garnering funny looks from other slightly early lingering parents (also from Z1 through the window though I didn't know that at the time) to squidging the glitter glue and pink glittery paint onto the cardboard ready to be spread about. Z1 even declared it to be "a lot of fun" a couple of times. Z2 joined in too.

children, crafting, crafts, snowflake tablecloth
Working hard
(note egg carton Advent calendar
in the background)
I think the beauty of glitter glue and glittery paint is that it's really easy to tidy up and wash afterwards. I am not in the least bit obsessive about things being clean and tidy, it's more that I don't like cleaning but I do feel an obligation to attempt to keep things clean. I was perfectly happy for the Zeds to squidge and rub and smear in a way I am not with other paint. Although, as I type that, I realise that poster paint is equally cleanable so it might be to do with the fact that even the mess of glitter glue looks pretty. Aaaaaah, sparkles.

The Husband and I wanted to hang them on the tree but Z1 wanted to put them on display so, without further ado, here they are.
pine cones, glitter, Christmas, craft, children's crafts
Glitter pine cones
(in vase in the centre picture)


In other news: The heart shaped Borax Christmas decoration turned out nicely.

Sunday, 9 December 2012

Of Crystals and Sparkle Sparrows

Sparkle sparrow, glitter, bird, glitter bird, glitter decorations, decoration, Christmas decoration
On Friday, after being Pyssla-ed off in the morning, I had time to go to my beloved Dollarama and I bought three of these beauties. Our Sparkle Sparrows (TM)* are perched on our stair bannister, cheering every trip up or down the stairs (apart from when they drive me slightly nuts by falling upside down). 

Saturday was rather rainy and miserable but was substantially brightened by a delightful lunch party during which a friend cooked delicious food for us and kept thanking me for letting her use my kitchen. Z1 was rather disappointed that there were not more children at the party and, after entertaining the troops for a bit, retired to her room. This did not prevent our Christmas crafts happening.


Borax, crystal, craft, children's craft, Christmas craft, pipe cleaners, Christmas, snowflake, decoration, Christmas decoration
Snowflake after 
Borax, crystal, craft, children's craft, Christmas craft, pipe cleaners, decoration, Christmas decoration, Christmas, snowflake
Snowflake before
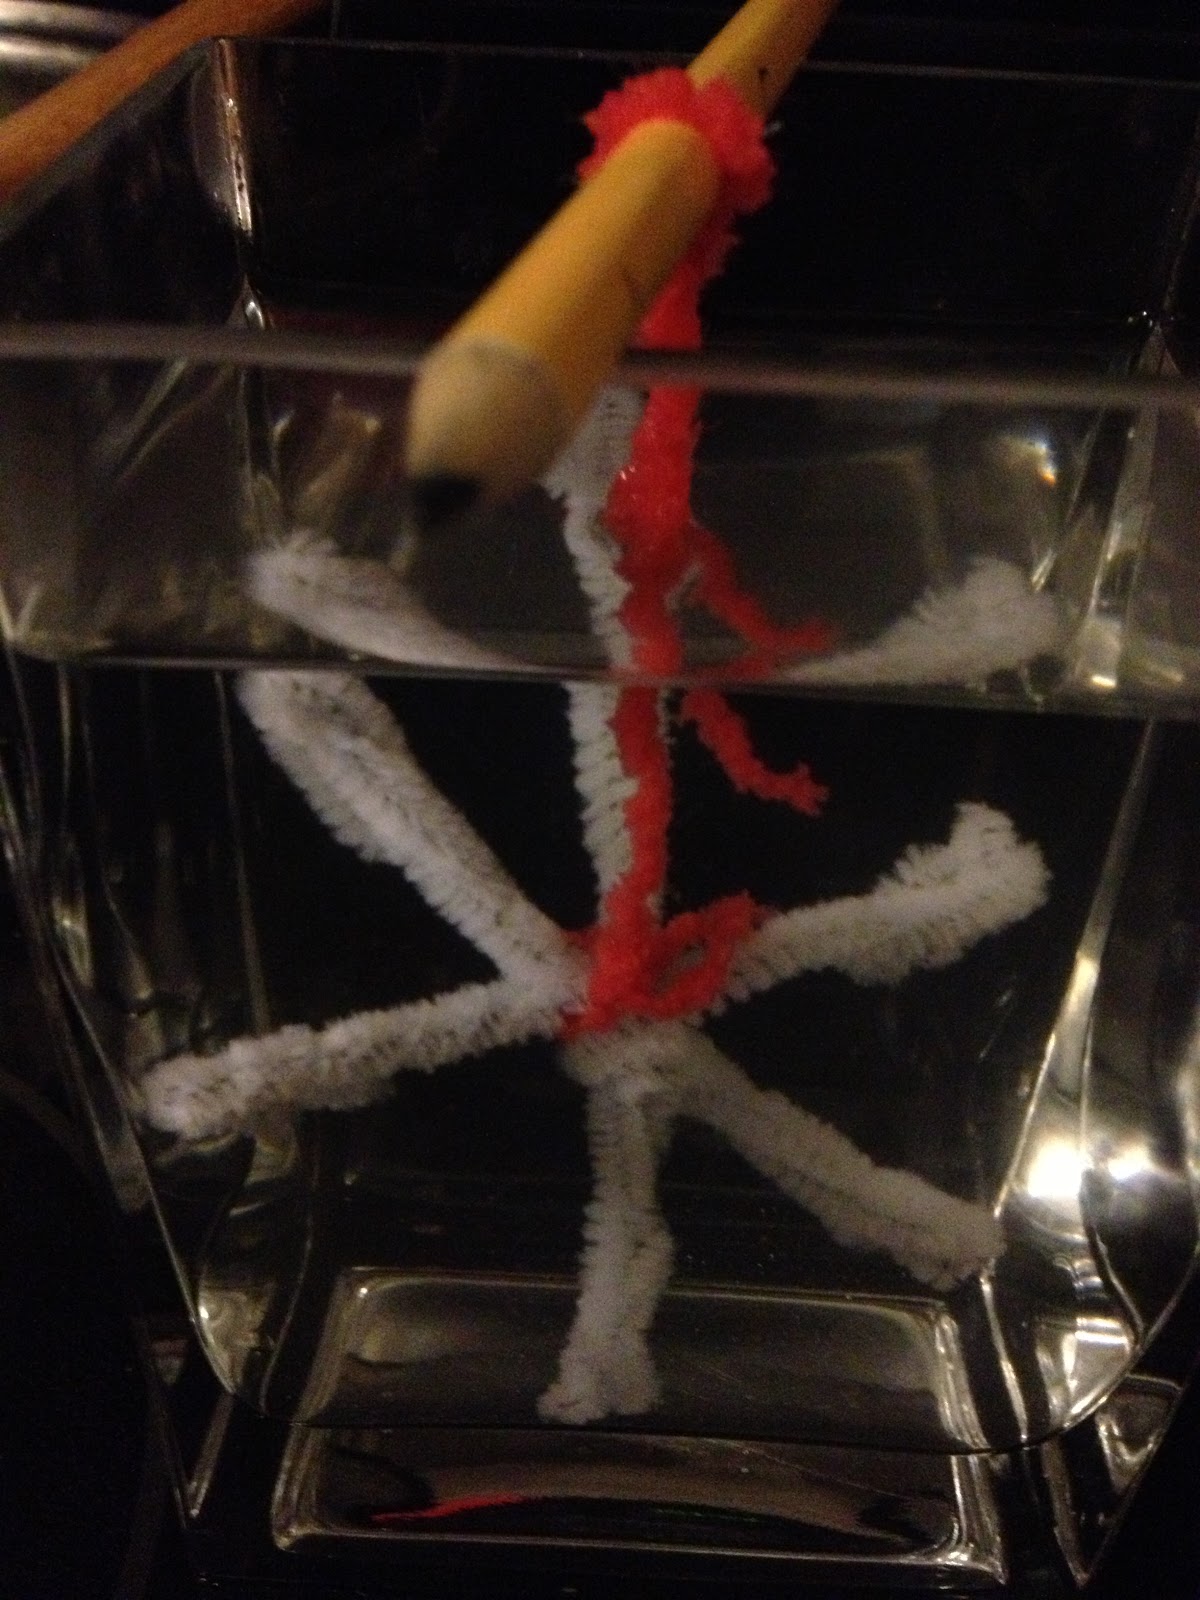
 This was one I was looking forward to - Borax snowflakes **. I set the apparatus up as you see on the left just before the Zeds went to bed on Saturday evening. Well, I actually  initially had it in a large glass jug that cracked when I poured boiling water into it, spilling boiling water all over the hob (stovetop) which had not yet been tidied up after all the cooking for lunch. Once the jug was disposed of and most of the water mopped up, I tried again with this vase which I warmed with hot tap water before pouring in the boiling water.
Borax, crystal, craft, children's craft, Christmas craft, pipe cleaners, decoration, Christmas decoration, Christmas, snowflake
Snowflake on the tree
The Husband and I kept checking it all evening to see what was happening - nothing much. Sunday morning was to be a lie-in for me but I ended up hopping out of bed not long after the Zeds and Husband as I was too excited to see what had happened with the Borax, water and pipe cleaners. As someone who very rarely gets an uninterrupted night's sleep and looks forward to a lie-in all week, this fact is significant. I was rewarded with the sparkly masterpiece you see here. Magnificent. Z1 immediately decided to do another, this time heart-shaped, so Sunday's craft was sorted instantly and is in process as I type. Once more, I have been checking on it frequently and it's fascinating seeing the crystals appear. 

Heart, heart shape, pipe cleaner, Borax, crystals, craft, children's craft
Heart-shaped sparkly
crystal loveliness
(before)
These, despite the lack of instant gratification, were a definite success and require hardly any time or skill to set up. I love them a lot.

Z1 has really taken to the pipe cleaners and she made me a bracelet as  
Christmas present (see, it's a Christmas present so it counts as a Christmas craft). This was entirely her own creation - all I did was provide the beads. I am allowed to wear it every day but if I untwist it and the beads spill onto the ground, she WILL NOT make me another. 

We also put the tree up this weekend. (The Husband kindly went out in the snowy dark to get it for me as he knew how much I wanted to get it today. Aw.) Christmas is coming. The goose is getting fat and it's less than two weeks 'til we depart for Dublin. This gives me butterflies in my tummy.


* not really TM but as named by Z1
** Credit where credit is due: I got this idea, via Pinterest, from Delia  Creates

Saturday, 1 December 2012

And we're off!

The day dawned, cold and overcast with an icing sugar sprinkling of snow on the ground. After a ballet class, a short restorative visit to the bee bakery, some eggy sandwiches and dispatching Z2 off with the husband to get a birthday present for the party we were due at later, Z1 and I were ready to start to conquer Christmas. Dun dun daaaaaaaaaaaaaaa!

I'd woken up thinking about ways of perforating egg box craters so that they could be easily torn off as Advent calendar doors. I'd envisioned intact egg cartons* glued closed after placing the chocolates inside, with the egg craters projecting upwards from the lid as well as down. Dear readers, this is not how egg cartons are made (at least not the ones I have). With easy stacking in mind, rather than easy Advent calendar making, they have flat tops. To further annihilate the feasibility of my plan, the egg craters are not sealed off from each other fully, so just turning the box upside down was not an option.

egg cartons, egg boxes, craft, crafting
Oh yes, the egg cartons
were not identical
I sat down at the kitchen table with the egg cartons in front of me to figure out what to do. I tore the lids off along the seam and put the egg crater parts upside down on the table. I decided they could be glued onto some cardboard from one of those cereal boxes I'd saved. Another obstacle became apparent - one of the egg cartons had raised bits so that it didn't sit flat. Pah! I attacked it with some venom using a scissors and cut the cereal box to size as a tray for both cartons. I drew around a coin for number labels for the craters. Preparation done.

Painting went smoothly. I had sponge tip brushes, we had red, green and sparkly pink paint and I cut out the number labels while Z1 painted away. We discussed whether ninjas were real, where they learned to be ninjas, whether our neighbour is a ninja and if teenage mutant ninja turtles really exist as we worked.

Once the paint was dry we stuck the number labels on. The relief I felt when I realised that we didn't need to fish any particular number out at any given time as they didn't need to be in order was disproportionate to how difficult that task would have been.
Hershey's kisses, Christmas, craft, chocolate, Christmas chocolate
Colour-coordinated
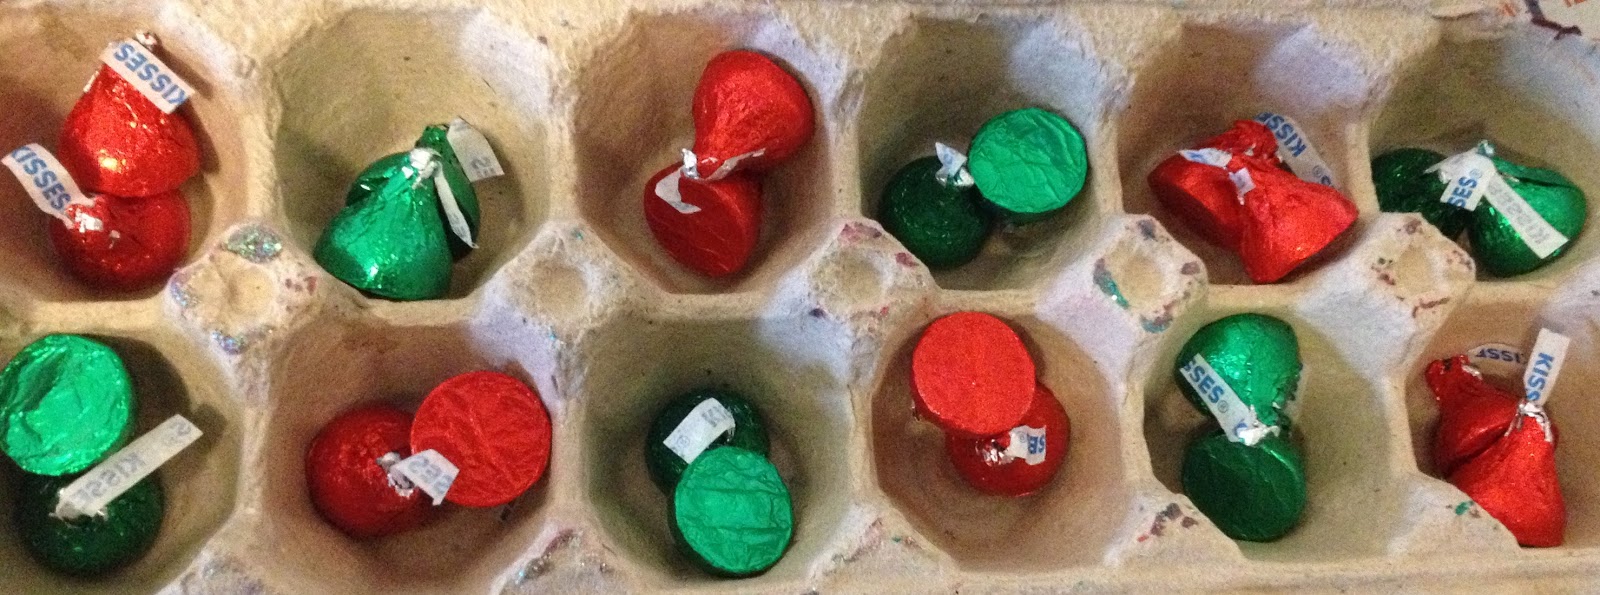
Z1 expertly filled each egg crater with two Hershey's Kisses, colour-coordinating them carefully. The three silver-coloured sweets mentioned in the previous post? Well, two went into the day one egg crater and one went into Z1's mouth. She was remarkably restrained in her   begging requests for sweeties.

As I squeezed the glue around the edges of the cartons ready for the base to be attached, Z1 said it was very like We're Going on Bear Hunt. I am sure she is right but I have absolutely no idea what she meant by that, even after her explanations.

With that, it was done. My morning musings on perforations were ready to be put into action. I got a pin and began to carefully pierce evenly spaced holes in the first crater. I quickly realised that I most definitely did not have the patience to do this for 24 craters and that I was not even sure it would be an effective method of making the craters openable. The pointy scissors was nearby so I decided to make larger holes with that, through which Zed-sized thumbs could be inserted to rip off the top (formerly the bottom) of the egg craters in order to access the chocolate in a slightly more violent manner than I had pictured. Some craters were a bit too squishy from wet paint to do this. This will be dealt with when we get to those craters. Z1 was eager to open crater number one. The thumb insertion method worked with a bit of help from me. Once I decided that the opened crater looked like a volcano (rather than a torn egg carton), I felt a lot better about this method and, as I type, am pleased I used the phrase "egg crater" rather than "egg hole" throughout this as it ties in nicely with the volcano idea.

So, with a heart bursting with pride, I present to you the first craft in the Conquering Christmas series, our delightful, beautiful, volcano-reminiscent Advent calendar made from egg cartons.
Advent calendar, countdown calendar, Christmas, egg box, egg carton, craft, crafting with children, craft for kids
The finished product complete with torn
open hole where '1' used to be. Z1 didn't completely
cover the cartons with paint. So there.

*I've settled on cartons rather than boxes

Monday, 29 October 2012

Hallowe'en - a warm up post

Being from Ireland, I grew up with Hallowe'en and its spooky excitement. The sound of children on the street in the dark going 'round the houses (or trick or treating, in more North American parlance) really thrilled me and made me nostalgic on our first Hallowe'en in our house in Dublin. We moved into this house in Toronto last Hallowe'en and it was so lovely to move in, then go out and about with the Zeds dressed up and then have all the children come to our door too. In fact, last year Z1 was more excited about giving out sweets to all our callers than she was about what she had got and even voluntarily started doling out some of hers when the stuff we had bought ran out...but I digress. Crafts, Hallowe'en and crafts.

So, despite having grown up with Hallowe'en, we didn't carve a pumpkin every year. I think pumpkins are more a North American thing and they were expensive. Mum would usually carve a turnip but we didn't all get involved, or I didn't anyway, so last year was my first ever pumpkin carving and I really enjoyed it (I was expecting to hate it a bit, to be honest) so was rather looking forward to this year.

I set aside Saturday (27th October) as Pumpkin Day and Z1 and I went out in the miserable rain with the buggy to buy our pumpkins (I got two, knowing I would want one to do all by myself) having bought the carving tools earlier in the week. Z2 was napping. Bonus.

Z1 was very eager to get going so we covered the table in newspaper, rolled up our sleeves and set to work. The tools were great - very little danger of injury and did the job. I soon had lids cut out of both and we got scooping seeds and stringy goo out of the pumpkins. This didn't get too messy for us but I imagine if Z2 had been involved or Z1 had been in a more boisterous mood, it could have been very messy indeed. This was the bit I dreaded last year but didn't find bad at all and it was fine this year too. In fact, it was kind of fun to scoop and scrape and plop it into the bag (slight guilt for not roasting the seeds and saving the flesh for soup and so on but I got over it pretty quickly).

I suggested to Z1 that she draw the face on so she'd have a guide to carve around and the kits we'd picked up in Dollarama had a piercing tool to pierce around a template. However, we used washable markers and they didn't really stay on the pumpkin skin...which I am now choosing to call the pumpkin hide. Despite this, she remained happily involved drawing a nasty face onto her pumpkin while I merrily carved mine. She barely even talked much (for her...and she is usually talking all the time. All. The. Time.) and it was most pleasant. When the time came for her to carve, we found it was tough going for her, so she took on more of a director's role while I did the carving and, overall, it was a most satisfying hour or so. And here they are. I won't say which was my creation and which was Z1's but I will admit to being quite proud of mine.


Halloween, Hallowe'en, pumpkins, jack o lanterns, jack o'lanterns, pumpkin carving, carved pumpkins, craft, crafting