Showing posts with label sharp objects. Show all posts

Monday, 6 January 2014

Post-Christmas present


buttons, craft, kindergarden craft, glue
Front
My mum is one of the unfortunate people who has her birthday rather close to Christmas. For her, it means people may have run out of gift-buying stamina (and money). For me, I always feel I want to get her something very lovely, as she is my mum, but I need to get organised and inspired quickly in order to get it to her on time.
Z1 said she would like to make her a brooch so I thought that, with a bit of supervision from me, we could make something that would be mum-worthy, personal and mailable. It would also be something that could occupy Z1 for a bit while I worked from home in the lazy, post-Christmas, huddle-in-from-the-cold-and-let-the-Zeds-watch-Arthur-Christmas-again-and-again days.
 

saftey pin, badge, buttons, jewellery, craft, gift, kindergarden
back
I discovered the craft section in Walmart in preparation for the great conquering Christmas craftathon of 2012. Generally speaking, I head to Dollarama for our craft needs but I felt for a real, proper birthday present for my mum, we could splash out on quality Walmart goods. Also, Walmart is near a lovely park with an ice rink so we could do skating before or after the dratted and dreaded shopping centre (ok, ok, mall, I do think of it as a mall, my assimilation to North America is well underway). I was hoping for brooch backs of some description and Z1 was going to choose the decorations for the brooch. I was going to steer her clear of anything too gaudy in the hope that my mum might actually, really want to wear the creation.
 
Sadly, Walmart did not provide a brooch back for us and so I made do with a cut up cereal box and a safety pin secured with sticky tape. It did, however provide some nice colourful buttons. I did try to convince Z1 to choose the darker colours rather than pastels but she would not be swayed. I had intended on covering up the back with shiny paper or something but we couldn't get the glue to stick well so I just let it be.
 
Z1 took charge of the size of the brooch and was planning to just stick the central button on after a careful selection process. Not only did this leave a not-so-attractive area of naked cardboard on the brooch, it was also only going to take a mere moment to complete so I encouraged the use of more buttons. I think that the finished object is good enough to be worn with pride by my lovely mum. I am sure she will receive it gratefully, graciously and with grandmotherly affection so I will keep my eyes open to see if she wears it at all, indicating that she truly likes it, when we next see her in the summer.


Monday, 11 November 2013

From Recycling Bin to Train: A Sunday Story


A very happy looking train
An indicator that you may have let your daughter watch too much television on a lazy Sunday is that she starts squirming and looking for something else to do. At some point, you may realise that telling her to sit still and watch the movie is probably not the best parenting. Crafts are an appealing indoor alternative that, one can hope, will not involve having to move too far from the very comfortable sofa.

In fact, the initial material-gathering steps didn't require me to move at all. Z1, under my instruction, salvaged the egg carton (writing this post stirred up my carton vs. box internal debate once more and I had to read here to see what I'd settled on last year) from the recycling bin. I did assure her that the bin wasn't too yukky. She also got the scissors and Husband was intercepted on his way down the stairs with some items for the recycling bin, to see if he had any useful materials.

At this point, I moved from the sofa and, under direction from Z1:

  1. got more cardboard (cereal box...cereal not quite finished so rolled up the bag and shoved it into the other open cereal box)
  2. brought her a toonie and a quarter, so she could choose which size would be more suitable for train wheels (oh yes, she had decided to make a train by this point, forgot that important detail)
  3. found the tape, which we keep on top of the microwave (of course we do, where else would one keep the tape?).


craft, egg carton, egg box, train, kindergarten
Side view
Her planning started well as she counted the dents on the top of the egg carton to see how many people she would need to fill them. However, once she started cutting out their bodies (rectangles of cereal box cardboard), she forgot how many she needed and just kept cutting until she tired of that task. I was drawing around the toonie and cutting out the circles which were to be wheels and people's heads.


She then instructed me to cut out the arms she had drawn. I pointed out that, as she had just drawn lines to be arms, I couldn't really cut them out. I was being a little belligerent at this point, truth be known. However, Z1 had a well of patience for me and my lack of initiative and cooperation. She calmly explained and demonstrated how to turn the lines into rectangles which could then be cut out to use as arms. Meanwhile, she was going through yards* of sticky tape to ensure the box would stay closed. I tried to just let her be but did remind her that wasting materials was not good craft practice.


T-shirts and trousers were then drawn and decorated by her, cut out by me and the assembling began. The once nude rectangles of cereal box had heads stuck on and t-shirts and trousers applied. She didn't bother with the arms I'd painstakingly drawn and cut. Pah. The chimney at the front was from Husband's old aftershave bottle and, if you look closely at the side view, you'll notice that one of the wheels had been destined to be a head to begin with.

Z2 asked where the driver was. Z1 told him the guy at the front was the driver. Everyone in the household is suitable pleased and impressed with Z1's train from recyclable materials. I trust you, dear readers, are too.

*I originally wrote "metres" here as I am a metric person but yards sounds better. Just thought you'd like to know.


Wednesday, 30 October 2013

Would pumpkin seeds be big for spiders?

Z1's plan

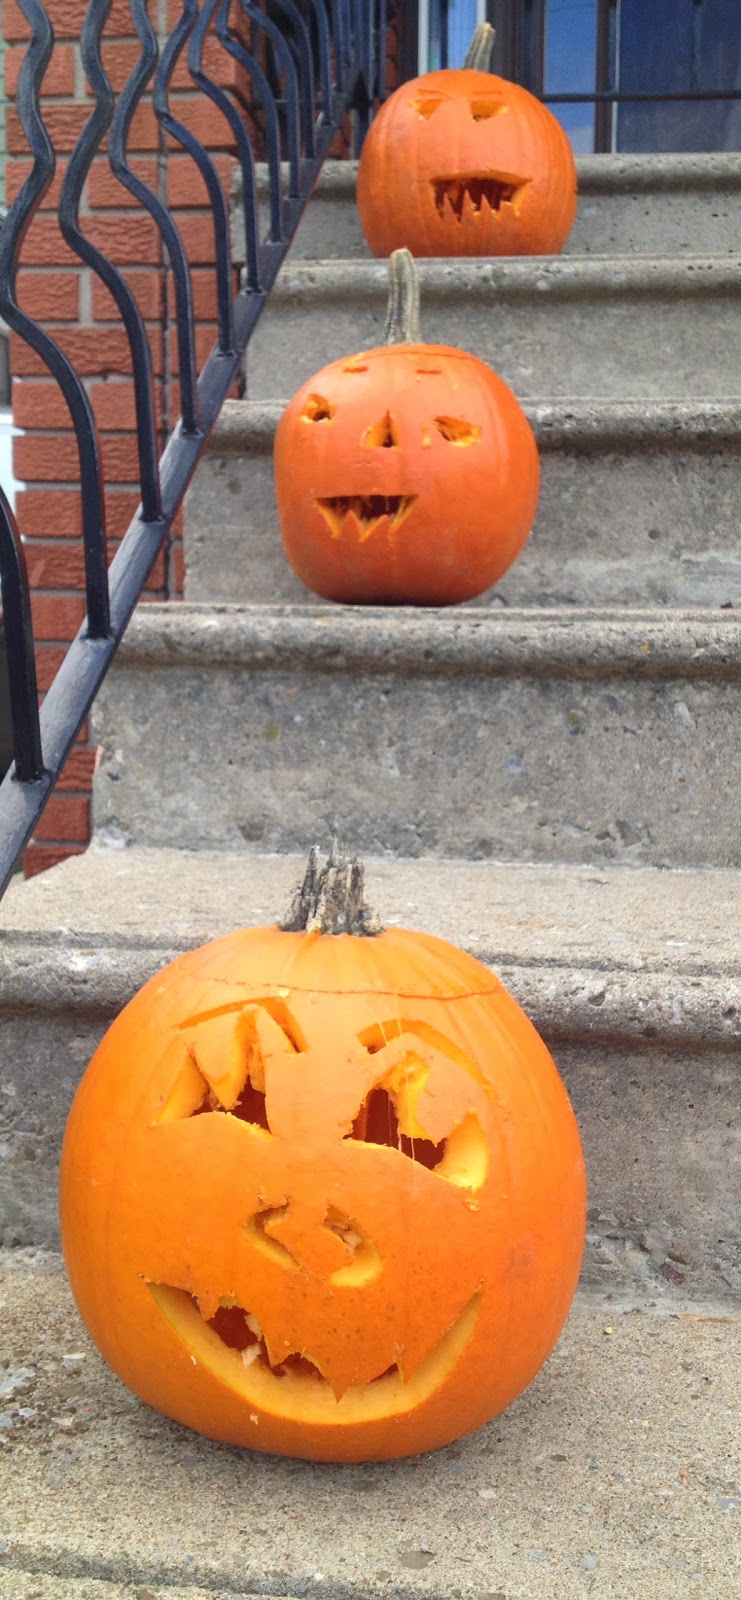
Mine, Z2's in the middle
& Z1's at the back
The first thing I must say is that Z2 was not impressed with the idea of hammering cookie cutters into his pumpkin. I really thought he would be as one of his first and favourite sentences for a long time was "I'll fix it with a hammer". However, now he is very big and three whole years old and he definitely wanted to use a sharp thing. Thankfully, the Dollarama pumpkin carving tools (oh yes, I have specific pumpkin carving tools, this is serious business) are not so sharp that I was concerned for his digits so he was allowed to wield one.
 Secondly, I should explain the title of this post. This was a question asked by Z1 during the course of our pumpkin carving. I was a little baffled by it so I asked her to clarify. It turns out she was imagining that the stringy bits of pumpkin guts that we gleefully hauled out with spoons and fingers were spider webs. As a result of this thought, she was wondering whether a spider the size of a pumpkin seed would be considered big. I decided it would be medium.
 Thirdly, it is worthy of note, I feel, that the eyebrows on Z2's pumpkin were entirely his own doing - he poked the holes and wiggled that carving tool around sufficiently to make them. He had help with all other features. Z1 also mostly took the role of artistic director on her pumpkin. The bluntness of the Dollarama carving tools not only makes them relatively safe for big three year olds, but also makes it fairly hard work to carve a pumpkin with them. Perhaps next year I shall upgrade my tools.


Z1's pumpkin
The last thing which I feel I must mention to make this post complete is that I went to the trouble of removing pulp and string from the seeds in order to roast/toast/bake them as snack. Z1 had tried some last year when one of her teachers did this and it does feel awfully wasteful, even for the spookily good price I bought these pumpkins for, to throw away such bounty.  Initial feedback was good, Z1 asked for more and said they tasted like popcorn. However, the next day Z2 specifically requested, out of the blue, that he not have pumpkin seeds for dinner and Z1 did not eat any of the seeds which I packed, with some degree of satisfaction, for her lunch. I quite like them but I feel that some of them may be destined for the rubbish bin after all.


Monday, 6 May 2013

No children were harmed in the making of this craft

fish silhouette, cutting out, scissors
First you must cut out your fishies
No children were harmed, indeed, since no children were involved. Between Pinterest and this blog, I have moved on from merely saving cereal boxes for future use to sitting down at the table while Z2 napped and Z1 watched...erm...probably Gnomeo and Juliet, not too sure as I was busy...to do a crafty thing.


fish silhouettes, collage, decoupage
Then you must glue your silhouttes
to the background

Z2's bedroom is painted blue, glossy blue, walls and ceiling. It makes it rather dark but I have decided to go with it and I call it the pond room and he has some mirrors in the shape of frogs on the wall and also this rug which I do love quite a lot. I decided he needed a shark poster which gradually evolved into me making these fish silhouettes.


This craft was a nice mix of being prepared and just making do with whatever I had to hand. Preparation included printing out the fish silhouettes. Making do included using a black marker to colour in the watermark bits as the silhouettes were from a stock picture library type thing. I also had carried them around in my bag for a few days so had to choose the non-crumpled fish to use. The frames were ones that I found about the house and the blue backgrounds are a blue card and a blue envelope which I also found around the house.


children's bedroom decor, children's bedroom art, fish, silhoutte, spotty tablecloth
Then you must display them with Z1's flower display
and a piece of her art in the background*
I am quite pleased with the finished results. Z1 was impressed and Z2 admired them. However, they are rather small for the expanse of bedroom wall so I may have to get my scissors out, find a few more frames and  do a few more. Or I might just buy the shark poster after all and hang these on either side.

*If you do not have any original Z1 artwork or flower displays to hand, you can improvise with art and flower displays created by yourself, your own child/dog/hamster or even shop-bought displays.

Friday, 1 February 2013

Feast your eyes on these marvellous marbles


winter craft, ice sculpture, craft with kids,
I love them
I don't think much needs to be said - just marvel at my marbles. Some of them weren't completely frozen but I didn't have the patience to wait longer.  I also didn't have the patience to keep my gloves on while snipping the balloons off. That was not a good idea.

Wednesday, 12 December 2012

Why I had 2 forks in my work bag today

A late afternoon work meeting yesterday and a Christmas concert with pot luck dinner at Z2's daycare today meant two afternoons of Christmas crafts in public places. I felt that Coffee Culture had had its fair share of the Zeds and me yesterday so Z1 and I went to Second Cup today. (Z2 remained in captivity so that he could make his grand entrance with the rest of the toddlers for the concert.)
pom poms, simple crafts, craft, Christmas
Sample pom poms


I prepared by putting a 2 forks (one each for me and Z1), 2 balls of slightly sparkly yarn (left over from the rainbow scarf project referred to in this post) and a pointy scissors (as opposed to the Z1-friendly scissors from yesterday ) in my work bag. I also made these little lovelies on the left to show Z1 what we were going to make.  Alas, I made them during my lunch break at work so it was too late to realise that the yarn tends to shed a bit and may not be the most suitable for pom-pom making.
brownie, pom pom earrings, pom pom, Christmas, craft, child
Pom pom earrings and
pom pom on fork in progress
A highlight of today's  cafe Christmas craft session (apart from the really nice chewy chocolate brownie) was when I suggested Z1 could wear my pre-prepared ones as earrings. (see right)

Two tone pom pom

She abandoned her brownie (which is how I know it was tasty - her abandonment resulted in my enjoyment of it) in favour of the craft so that was a good sign. On the right, you see her contemplating her wrapped fork. She had the idea of using two colours of wool on one pom pom which made a pom pom with a different coloured core. We made one pom pom before moving on to other things. Just one.
Borax crystal heart, pipe cleaners, pom poms, Christmas decoration, Christmas tree
Pom poms on the tree
(with Borax crystal heart in the background)


In other news: I have abandoned the idea of including information about cost, messiness, time taken etc. on the crafts. I felt this is more about the experience than a how-to guide. Also, it was kind of annoying to do and took up too much blog space.

Credit where credit is due: I found the idea for these at Mrs. Fox's blog here

Tuesday, 11 December 2012

Christmas Crafts in a Cafe

Inspired by this blog (via Pinterest) and with a couple of hours to kill with the Zeds between picking Z1 up from school and going to a late afternoon meeting for work, I though a little snipping of coffee filters in a cafe would be perfect to pass the time.
I prepared a few examples the night before, pre-folded a few coffee filters (the very coffee filters that I nearly misbought in Walmart back in November ) and remembered to put a Z1-friendly scissors in my bag. Organised, I was.
Combining cake, crafts, crumbs and coffee in a cafe called Coffee Culture with children was a little chaotic (and alliterative). See.
snowflake, coffee filter, Christmas craft, Christmas decoration, scissors, zebra dress
Attempted snipping, our
favourite one, cake remnants,
and coloured in snowflake 
Hmm...perhaps you can't quite see the chaos there but I had to prevent Z2 from knocking over my ridiculous butterscotch caramel (or something like that) latte and from sitting on the cake and from snipping things whenever the scissors was put down for a moment. I also had to allay the wrath of Z1 when I was pleased with a snowflake that I made and she was angered that it was nicer than the one we collaborated on. I convinced her that my one was inspired by her so she could take credit. Phew.

All that and Z1 decided that she couldn't do it. I am not sure why as she does cutting out quite well, usually. It may have been that she was very tired - I handed over two rather cranky, tired Zeds when the time came for me to skedaddle to my meeting.

She did like the idea, though, and decided she would join in by colouring the filters before I cut them. The fact that the only colouring implement we had to hand was a blue biro did not put her off. So here they are - cut by me and one coloured by her. The nice thing about this is that the more I did, the more I wanted to do as I figured out what looked pretty. And coffee filters come in packs of hundreds. And we don't even have a coffee machine to use them up. I may just wallpaper the house with snowflakes.
coffee filter snowflakes, Christmas craft, paper snowflakes, craft, snowflake decorations, Christmas decorations
Coffee filter snowflakes

Credit where credit is due: There are a lot of versions of this kicking about the internet but I found this via Pinterest from Heart of Wisdom (direct link to blog post up above in my post)

Saturday, 1 December 2012

And we're off!

The day dawned, cold and overcast with an icing sugar sprinkling of snow on the ground. After a ballet class, a short restorative visit to the bee bakery, some eggy sandwiches and dispatching Z2 off with the husband to get a birthday present for the party we were due at later, Z1 and I were ready to start to conquer Christmas. Dun dun daaaaaaaaaaaaaaa!

I'd woken up thinking about ways of perforating egg box craters so that they could be easily torn off as Advent calendar doors. I'd envisioned intact egg cartons* glued closed after placing the chocolates inside, with the egg craters projecting upwards from the lid as well as down. Dear readers, this is not how egg cartons are made (at least not the ones I have). With easy stacking in mind, rather than easy Advent calendar making, they have flat tops. To further annihilate the feasibility of my plan, the egg craters are not sealed off from each other fully, so just turning the box upside down was not an option.

egg cartons, egg boxes, craft, crafting
Oh yes, the egg cartons
were not identical
I sat down at the kitchen table with the egg cartons in front of me to figure out what to do. I tore the lids off along the seam and put the egg crater parts upside down on the table. I decided they could be glued onto some cardboard from one of those cereal boxes I'd saved. Another obstacle became apparent - one of the egg cartons had raised bits so that it didn't sit flat. Pah! I attacked it with some venom using a scissors and cut the cereal box to size as a tray for both cartons. I drew around a coin for number labels for the craters. Preparation done.

Painting went smoothly. I had sponge tip brushes, we had red, green and sparkly pink paint and I cut out the number labels while Z1 painted away. We discussed whether ninjas were real, where they learned to be ninjas, whether our neighbour is a ninja and if teenage mutant ninja turtles really exist as we worked.

Once the paint was dry we stuck the number labels on. The relief I felt when I realised that we didn't need to fish any particular number out at any given time as they didn't need to be in order was disproportionate to how difficult that task would have been.

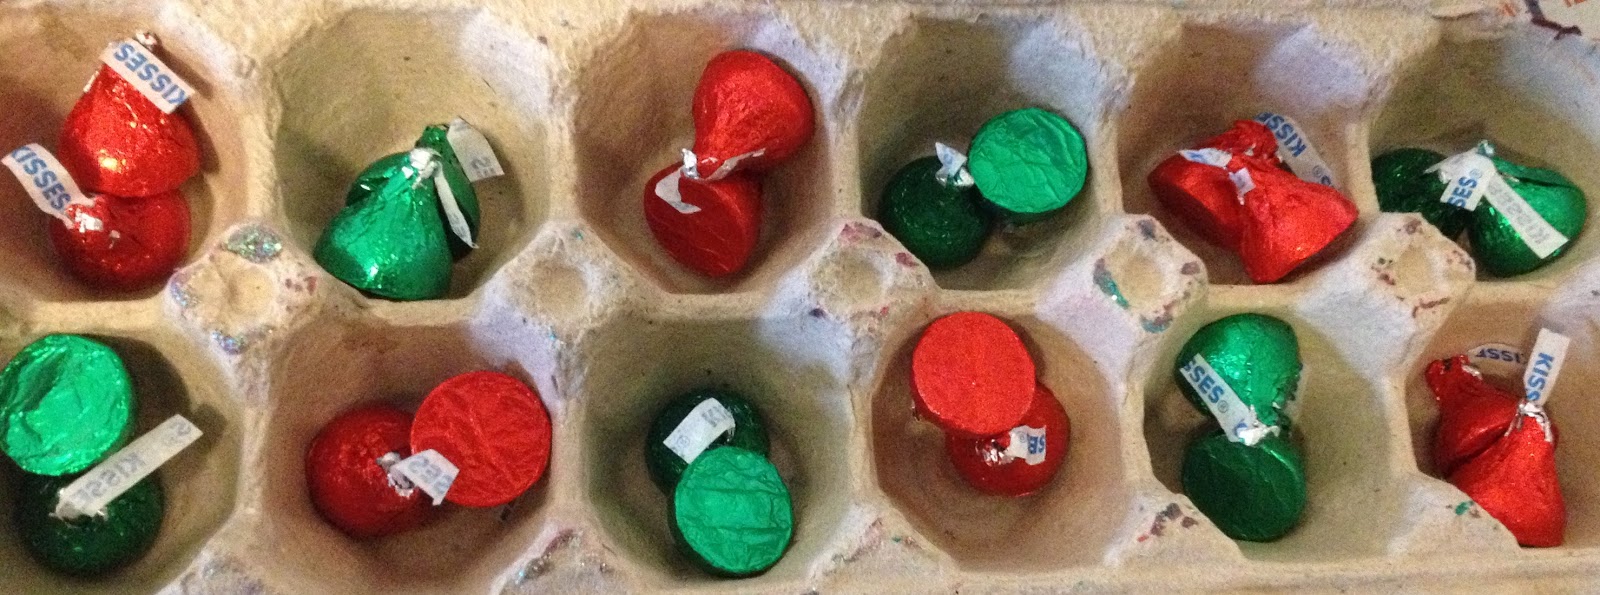
Hershey's kisses, Christmas, craft, chocolate, Christmas chocolate
Colour-coordinated
Z1 expertly filled each egg crater with two Hershey's Kisses, colour-coordinating them carefully. The three silver-coloured sweets mentioned in the previous post? Well, two went into the day one egg crater and one went into Z1's mouth. She was remarkably restrained in her   begging requests for sweeties.

As I squeezed the glue around the edges of the cartons ready for the base to be attached, Z1 said it was very like We're Going on Bear Hunt. I am sure she is right but I have absolutely no idea what she meant by that, even after her explanations.

With that, it was done. My morning musings on perforations were ready to be put into action. I got a pin and began to carefully pierce evenly spaced holes in the first crater. I quickly realised that I most definitely did not have the patience to do this for 24 craters and that I was not even sure it would be an effective method of making the craters openable. The pointy scissors was nearby so I decided to make larger holes with that, through which Zed-sized thumbs could be inserted to rip off the top (formerly the bottom) of the egg craters in order to access the chocolate in a slightly more violent manner than I had pictured. Some craters were a bit too squishy from wet paint to do this. This will be dealt with when we get to those craters. Z1 was eager to open crater number one. The thumb insertion method worked with a bit of help from me. Once I decided that the opened crater looked like a volcano (rather than a torn egg carton), I felt a lot better about this method and, as I type, am pleased I used the phrase "egg crater" rather than "egg hole" throughout this as it ties in nicely with the volcano idea.

So, with a heart bursting with pride, I present to you the first craft in the Conquering Christmas series, our delightful, beautiful, volcano-reminiscent Advent calendar made from egg cartons.
Advent calendar, countdown calendar, Christmas, egg box, egg carton, craft, crafting with children, craft for kids
The finished product complete with torn
open hole where '1' used to be. Z1 didn't completely
cover the cartons with paint. So there.

*I've settled on cartons rather than boxes

Monday, 29 October 2012

Hallowe'en - a warm up post

Being from Ireland, I grew up with Hallowe'en and its spooky excitement. The sound of children on the street in the dark going 'round the houses (or trick or treating, in more North American parlance) really thrilled me and made me nostalgic on our first Hallowe'en in our house in Dublin. We moved into this house in Toronto last Hallowe'en and it was so lovely to move in, then go out and about with the Zeds dressed up and then have all the children come to our door too. In fact, last year Z1 was more excited about giving out sweets to all our callers than she was about what she had got and even voluntarily started doling out some of hers when the stuff we had bought ran out...but I digress. Crafts, Hallowe'en and crafts.

So, despite having grown up with Hallowe'en, we didn't carve a pumpkin every year. I think pumpkins are more a North American thing and they were expensive. Mum would usually carve a turnip but we didn't all get involved, or I didn't anyway, so last year was my first ever pumpkin carving and I really enjoyed it (I was expecting to hate it a bit, to be honest) so was rather looking forward to this year.

I set aside Saturday (27th October) as Pumpkin Day and Z1 and I went out in the miserable rain with the buggy to buy our pumpkins (I got two, knowing I would want one to do all by myself) having bought the carving tools earlier in the week. Z2 was napping. Bonus.

Z1 was very eager to get going so we covered the table in newspaper, rolled up our sleeves and set to work. The tools were great - very little danger of injury and did the job. I soon had lids cut out of both and we got scooping seeds and stringy goo out of the pumpkins. This didn't get too messy for us but I imagine if Z2 had been involved or Z1 had been in a more boisterous mood, it could have been very messy indeed. This was the bit I dreaded last year but didn't find bad at all and it was fine this year too. In fact, it was kind of fun to scoop and scrape and plop it into the bag (slight guilt for not roasting the seeds and saving the flesh for soup and so on but I got over it pretty quickly).

I suggested to Z1 that she draw the face on so she'd have a guide to carve around and the kits we'd picked up in Dollarama had a piercing tool to pierce around a template. However, we used washable markers and they didn't really stay on the pumpkin skin...which I am now choosing to call the pumpkin hide. Despite this, she remained happily involved drawing a nasty face onto her pumpkin while I merrily carved mine. She barely even talked much (for her...and she is usually talking all the time. All. The. Time.) and it was most pleasant. When the time came for her to carve, we found it was tough going for her, so she took on more of a director's role while I did the carving and, overall, it was a most satisfying hour or so. And here they are. I won't say which was my creation and which was Z1's but I will admit to being quite proud of mine.


Halloween, Hallowe'en, pumpkins, jack o lanterns, jack o'lanterns, pumpkin carving, carved pumpkins, craft, crafting